During the pandemic, I added a UV laser, not much bigger than a cat toy, to my CNC. Using LightBurn software to control the laser power and CNC travel, I was able to make successful cyanotypes without an acetate negative and sunlight or a mercury vapor lamp.
CNC and cyanotype tests. Jay at JTech Photonics was extremely helpful in getting me started. He ships the laser drivers set to burn. I had to turn mine down with the potentiometer to avoid vaporizing the emulsion.
CNC can be programmed to expose in any orientation. This video is 45° to the X axis. Multiple passes can be done at different angles with LightBurn software to hide the scan lines.
Christopher Tannic Acid Toned Cyanotype 6×7 print on Arches Platine
Morel Mushrooms 6×6 on Arches Platine toned with tannic acid 405 laser at 600dpi
You can see the faint toned stain of the emulsion in the mushroom print. The laser doesn’t expose the brushed edges like most cyanotype prints unless you put a 100% black border around your image.
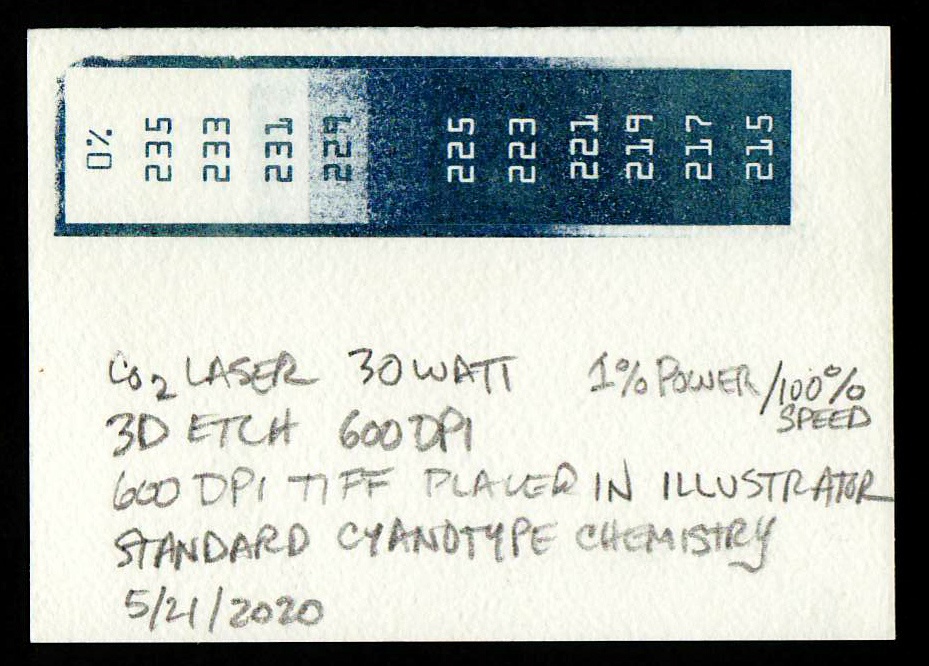
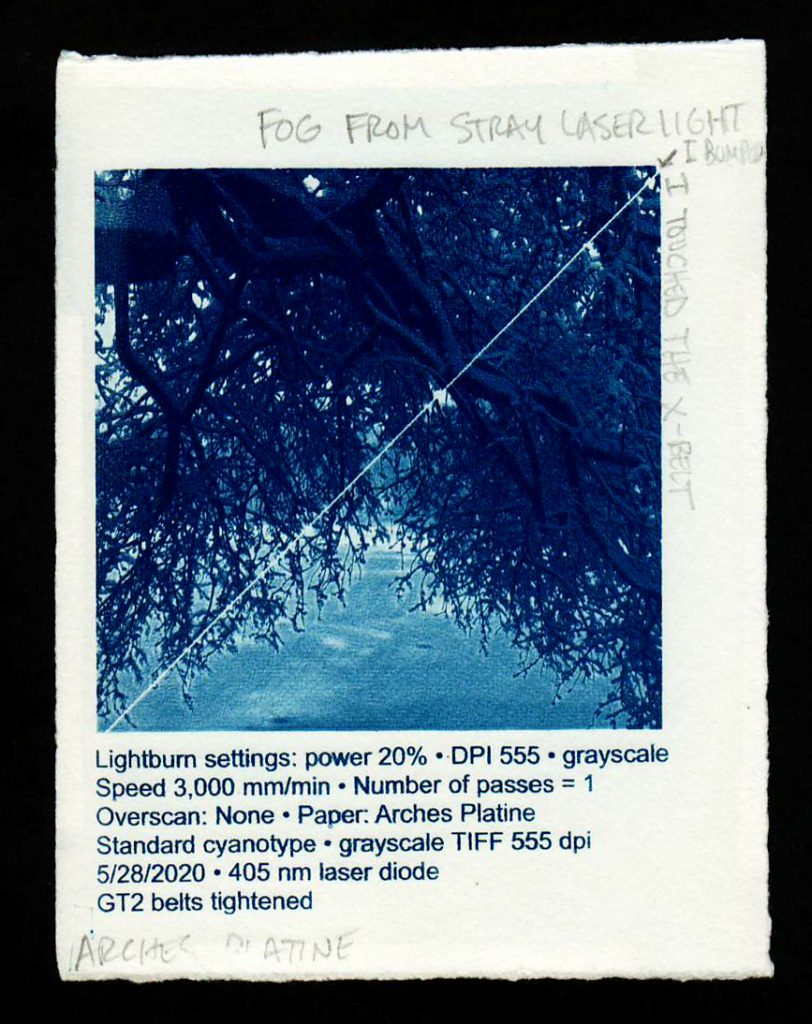
An attempt to etch 0-255 tonal scale with CO2 laser before switching to 405nm wavelength. You can see around the zero exposure that the emulsion was vaporized, and the paper was etched at only 1% power and 100% speed. That’s approximately equivalent to a third of a watt on a 30 watt CO2 laser. Epilog’s 3D etch software setting varies the power output for each pixel, instead of converting continuous tone a stochastic halftone. Heat can release the cyanide from potassium ferricyanide, so this option was out.In an attempt to split the tonal scale into something the CO2 laser could expose, I split each gray from previous test strips that had any tone until I got down to 233-225. Somewhere in there are a series of 8 tones that the laser is capable of exposing as an image. Theoretically, you could map your continuous tone image to these 8 tones for CO2 laser image creation. I switched to a 405nm UV laser.The top test strip is to figure out the focal length for the diode laser in the 405nm setup. The beam is actually rectangular at it’s origin, and needs to be focused to a point with a fine lens.Tonal test strip for 405nm UV laser. Trying to split the grays into a scale that exposes well.Trying to find the sweet spot between the CNC’s steps, the laser beam width, and the image DPI. To keep the stepper motors cool, I didn’t turn on the always-engaged function, so a minor touch moved the gantry just enough to create a white streak. Also, since the beam has some stray light output, I added a black snoot to the lens as a crude collimator. It’s just a turn of black gaff tape. Every photo assistant learns that gaffer’s tape can fix almost any problem.


Lovely job – Great to see invention like this.
Thanks Alan!
Very exciting. ( know that’s sort of an accidental electron pun, but I mean it).